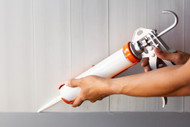
How to Use a Silicone Gun
Apr 8th 2024
A silicone gun, or silicone caulk gun, is used to fill gaps and cracks using a sealant. Homeowners and professionals frequently use caulk to fill gaps, such as those around window and door frames or plumbing fixtures.
A tube of caulk applied using a silicone gun is hard to beat for effectively closing troublesome gaps. However, knowing how to use a silicone sealant gun is essential to getting the job done right.
Types of Caulk
Before diving into the caulking process, it’s important to understand the different types of caulk. That way, you can decide which is the best fit. Here are some of the most common variations of caulk and how they can be used in different situations:
- Silicone sealant caulk. Silicone caulk is flexible, moisture-repellant, and incredibly durable. Because of its durability, it is frequently used to close gaps in windows and bathroom or kitchen fixtures. If applied properly, silicone caulk can last up to 20 years.
- Latex caulk. Latex caulk, also known as acrylic latex caulk, is an inexpensive but durable caulking option. Sometimes referred to as “painter’s caulk,” latex caulk is frequently used to seal gaps in wood, masonry, and drywall. When applied properly, it typically lasts for 10-15 years.
- Butyl-rubber caulk. This caulk is reserved for outdoor use and is ideal for roofing, construction, and exterior repairs. Butyl-rubber caulk remains secure against extreme temperatures and weather conditions. It’s best used on materials like metal, concrete, rubber, vinyl, exterior wood, mortar, aluminum, stone, and plastics.
- Expandable foam caulk. Expandable foam caulk expands to fill large gaps and holes and has essential insulating properties to reduce excessive sound. It is often used to repair cracks in foundations for older homes or for soundproofing purposes.
How to Use a Silicone Gun
Let’s break down how to use a silicone gun step-by-step.
1. Prepare the Area
First, you need to prepare the area where you’ll be caulking. Ensure proper caulk removal by using a putty knife or utility knife to remove leftover caulk. Then, clean the surrounding area. If you need help to remove the lingering caulk, you can use a caulk softener to get the job done right.
Once you’ve removed the existing caulk, clean the area using rubbing alcohol, hot water, and disinfectant. This will eliminate dirt and germs around the gap. Allow the surface to dry before applying painter's tape around the gap to protect the surrounding area.
2. Load the Silicone Gun
Next, you need to load the caulking gun. To start, squeeze the trigger on the back of the caulking gun to pull the metal rod back. Take the caulk tube and load the caulk into the silicone gun. Ensure the tube’s nozzle faces outwards with the flat base of the gun facing you.
3. Cut the Tip of the Caulk
The shape of the caulk tube’s tip determines how thick the bead will be. The nozzle should be cut at a 45-degree angle. If you require a thicker line of caulk, cut the nozzle lower down the tip. If you need a narrower line, cut near the top of the tube.
If you aren’t positive about how thick you need the caulk line to be, start by cutting near the end of the nozzle and adjust the opening to be bigger if necessary.
4. Apply the Silicone Caulk
Now, it’s time to apply the caulk to the area of concern. Before sealing the gap, it’s best to practice using the caulking gun to ensure you’re operating the tool properly. Take a piece of paper and push the caulk using the trigger release – this will allow you to assess the bead’s thickness and determine whether it’s correct to close your gap.
You can move on to the affected area once you’ve practiced using the caulking gun. Hold the silicone gun at a 45-degree angle and press on the trigger, starting on one end of the gap and moving toward the center. Once you reach the center, work on the other end of the gap and meet the caulk lines in the middle.
Keep your hands steady as you apply caulk, using one hand to press the trigger and the other to guide the gun along the application line. After filling the gap, identify any missed areas and cover them again for an even application. If the caulk stops coming out of the tip, release the trigger, then press it again to resume the flow.
5. Smooth the Caulk
After you’ve applied caulk to the gap, excess caulk might remain. Using a spoon, smoothing tool, or your finger covered with a disposable glove, go over the caulking line and smooth the caulk until it’s applied evenly and has a clean finish.
Once you’re happy with your caulking job, remove the painter’s tape and allow the area to dry completely. Caulk usually dries to the touch within a few hours but might take 48 hours to dry and cure properly. Once you’ve allowed the area to dry, you’re all done!
Explore Silicone Sealants From Silicone Depot
Finding high-quality silicone sealants to use in your silicone gun is essential to getting improvement projects done correctly and ensuring your upgrades are secure for years to come. Silicone Depot provides the best available silicone sealants to meet your renovation and construction needs.
Silicone Depot offers premiere caulking materials to fill the gaps in your home and keep your fixtures secure. Explore our sealing and caulking accessories today!

